3d printing

class="post-1670 post type-post status-publish format-standard has-post-thumbnail hentry category-3d-print category-fab-textiles category-talleres tag-3d-printing tag-bootcamp tag-fab-lab-barcelona tag-fab-lab-bcn tag-fab-textiles tag-fabtextiles tag-iaac tag-laser-cutting tag-soft-fabrication tag-textiles tag-workshop-fab-lab tag-workshops">

Fab Textiles Bootcamp

20160609_143950
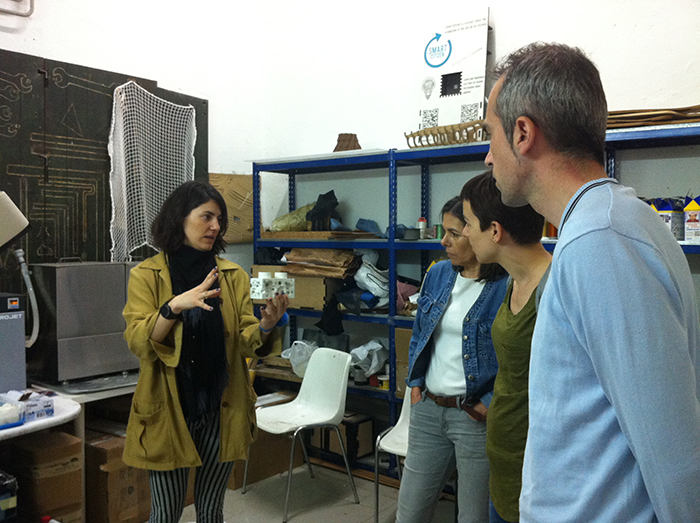
Bootcamp with Icelandic teachers:
Introduction to soft fabrication and the use of digital fabrication applied on textiles and fashion
 
New mediums of production and accessibility to new technologies are changing the way we learn, design, produce and consume. Fashion education and the industry are still in the process of adaptation to the new technologies and the open source culture. Innovative processes and multidisciplinary synergies are defining the new era, which calls upon the awareness of the way things are made and the opportunities that the new tools offer to innovate and reimagine the future.
This bootcamp with FATEX – Association of apparel and textile secondary school teachers focused on transmitting Digital Fabrication and New Technologies applied in Fashion. Digital fabrication allows us to experiment with the way we design, produce and consume fashion introducing the participants to 3D modelling, parametric design, 3D printing, new techniques and materials.
IMG_1146
IMG_2653
 kombucha culture/ grow your own textile
Day 1 (6 hours)
Presentation of the Roadmap of the fab textiles projects.
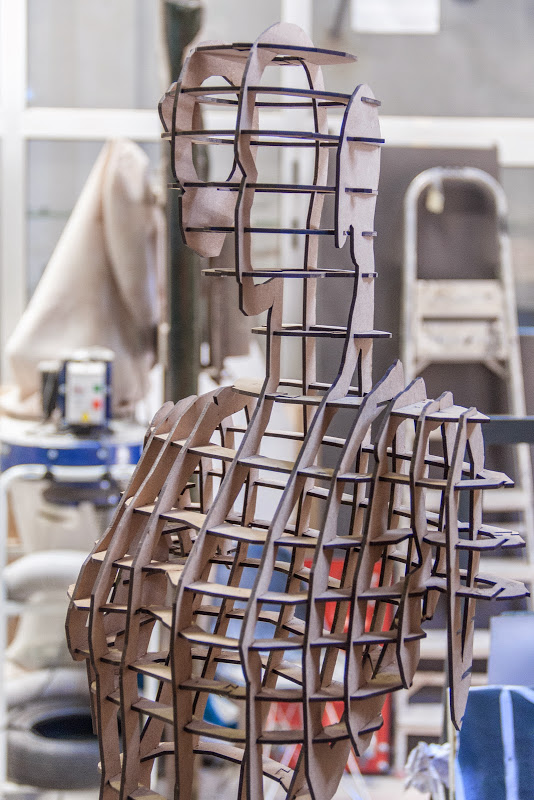
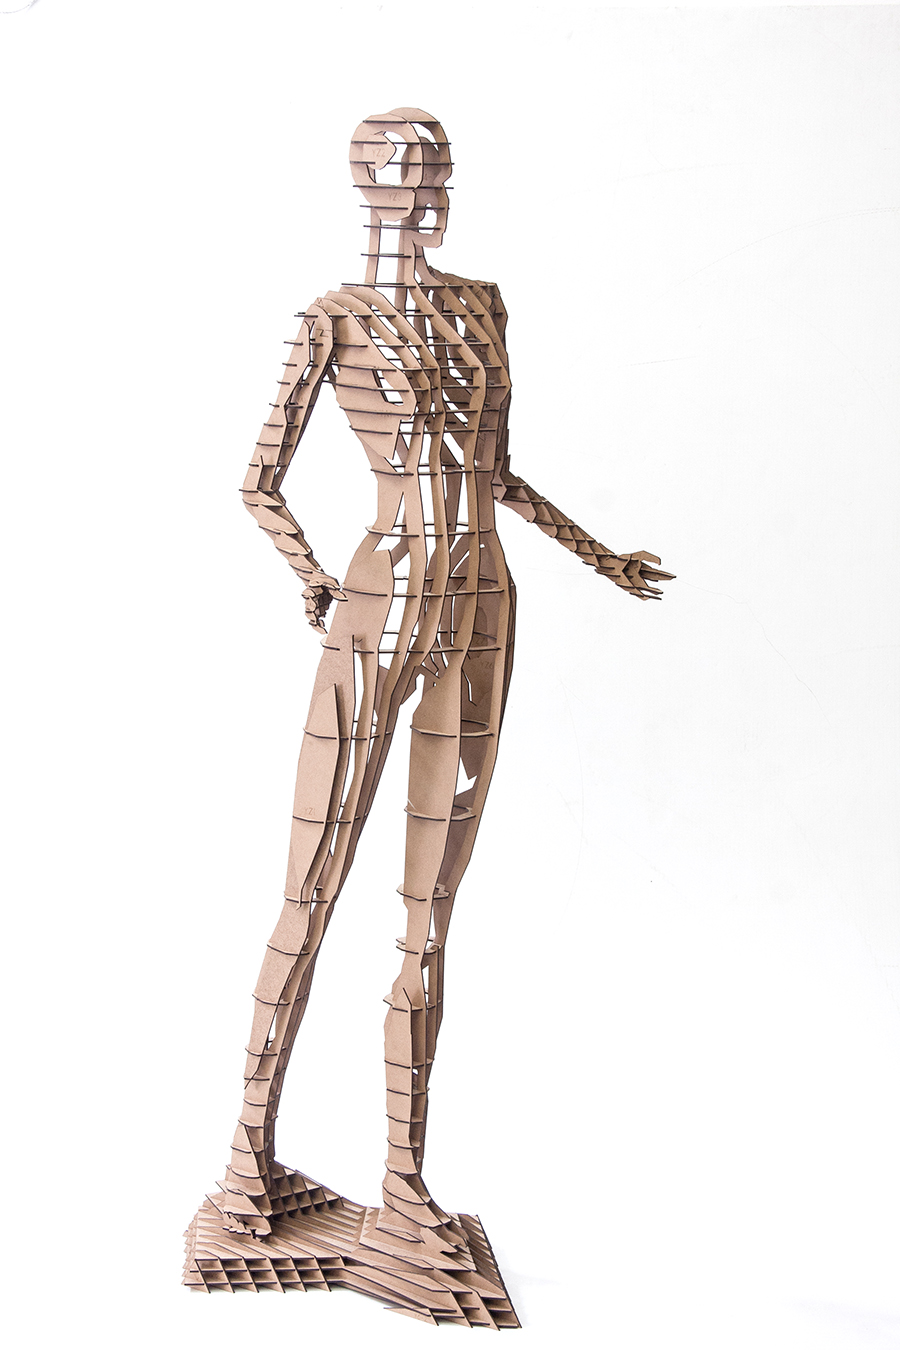
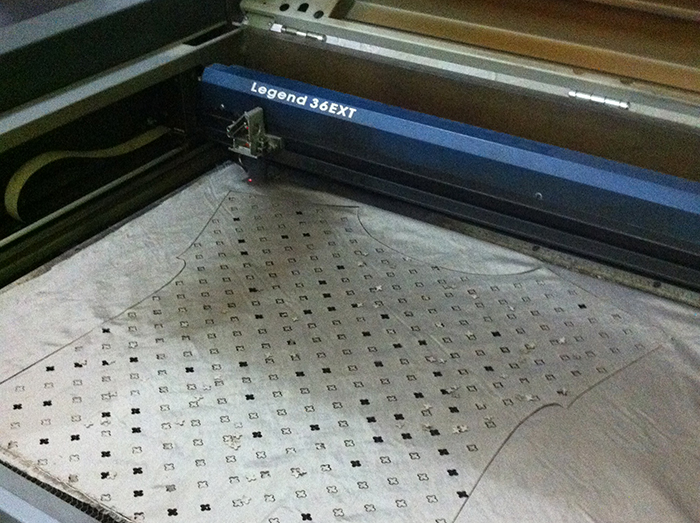
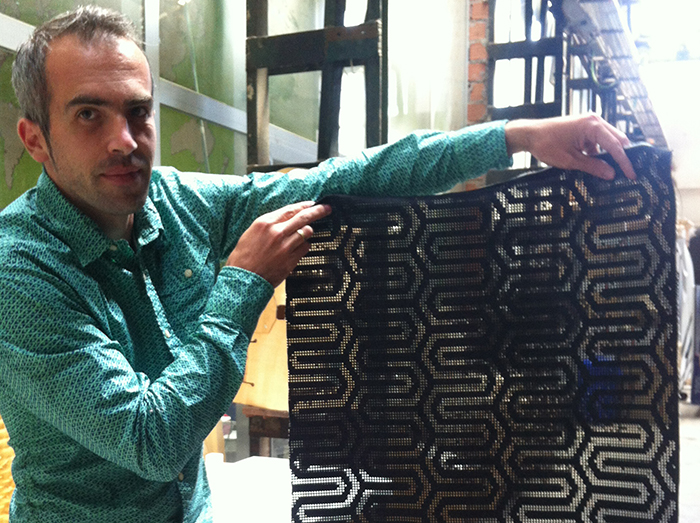
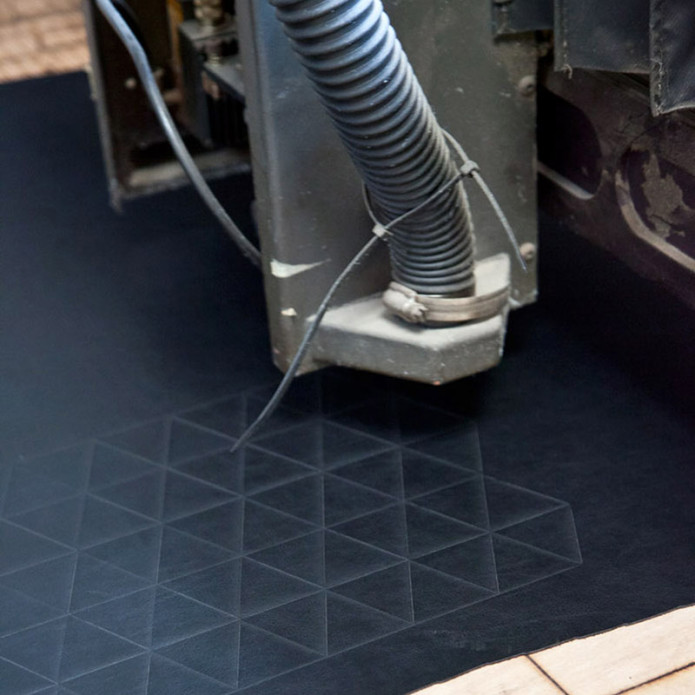
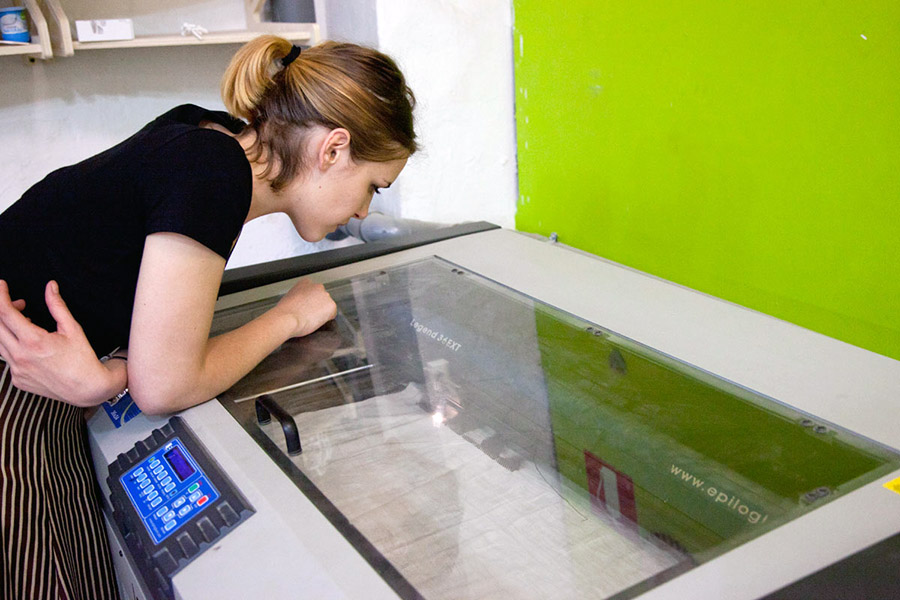
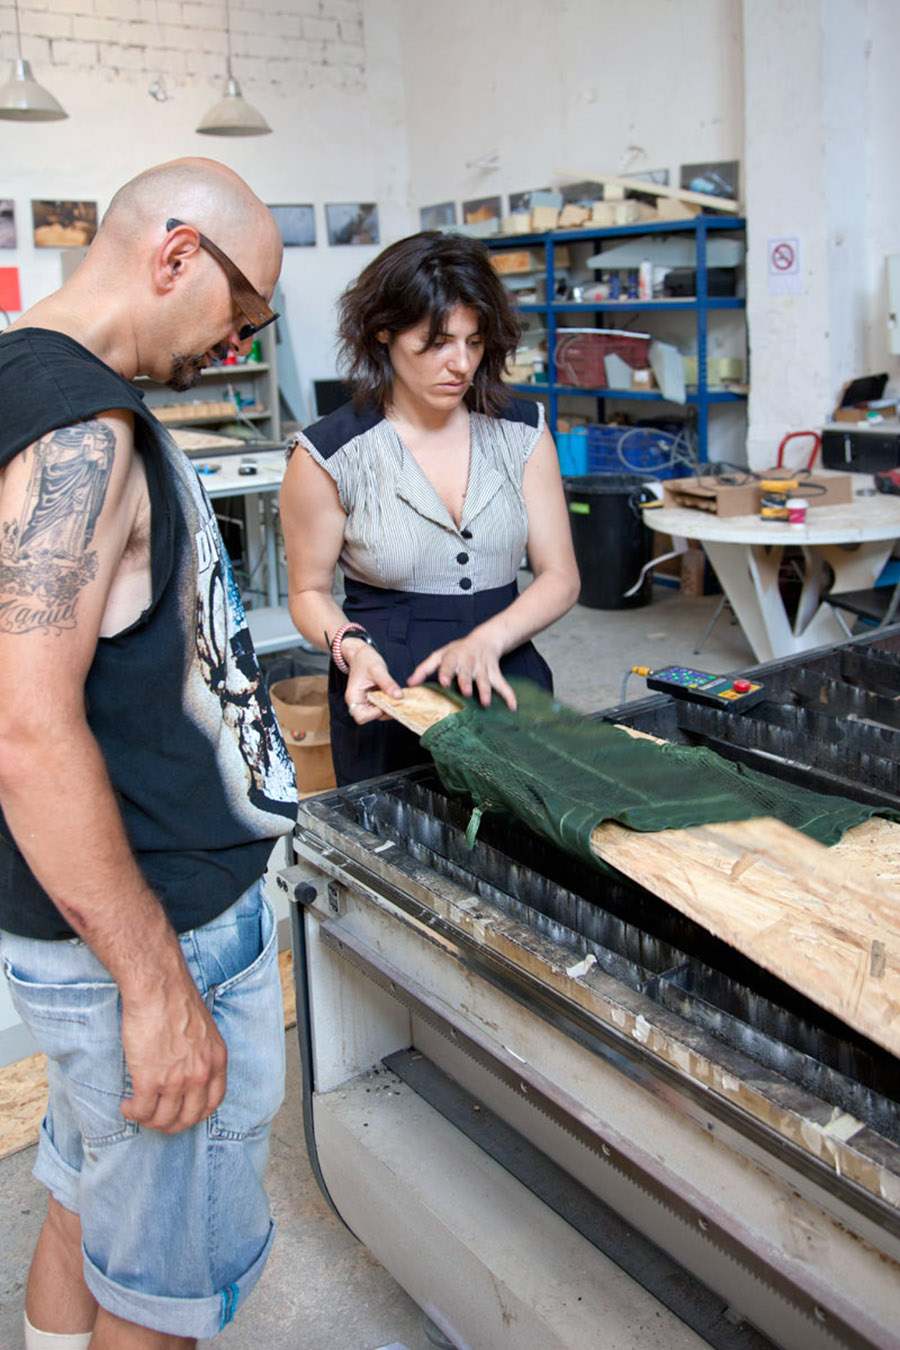
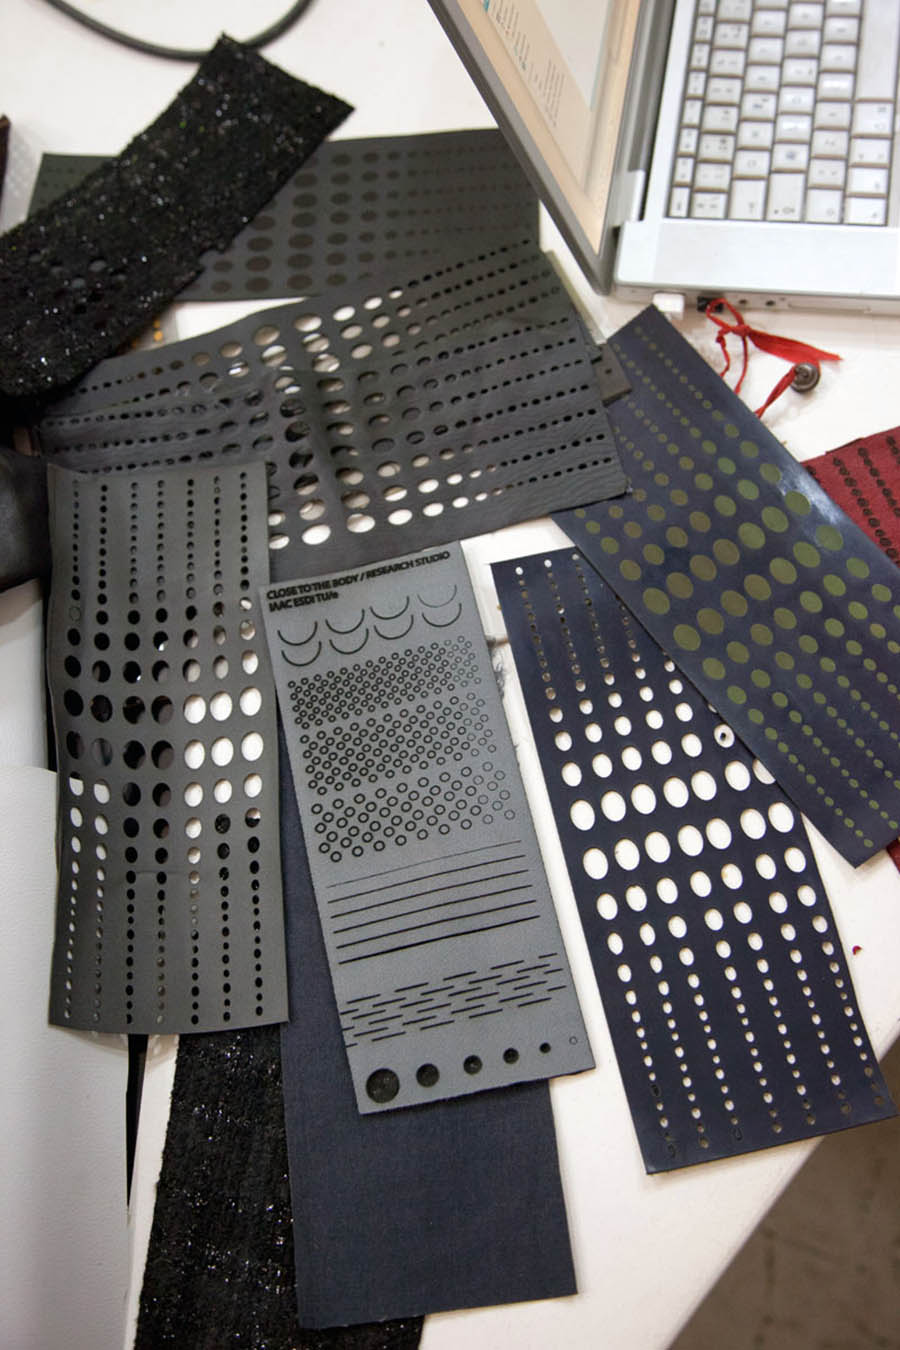
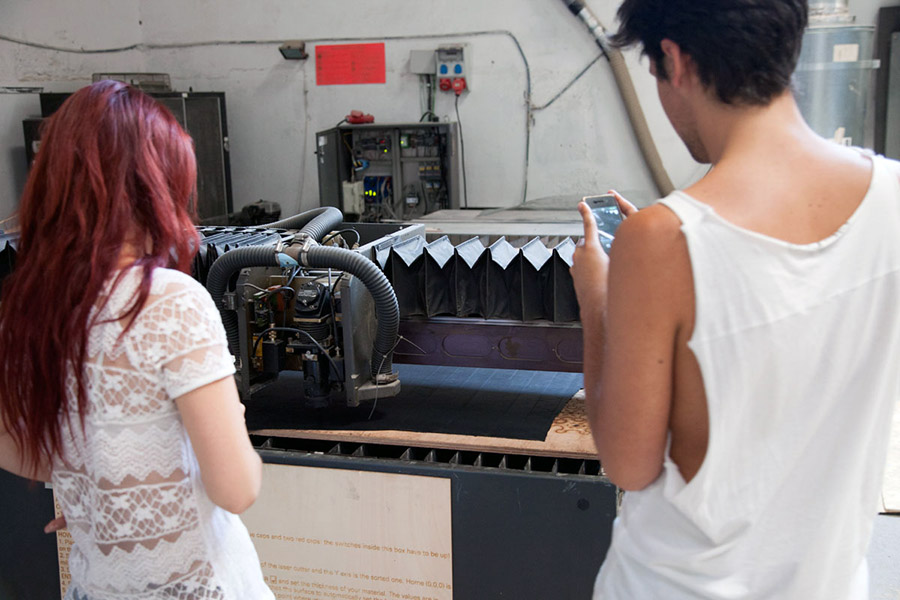
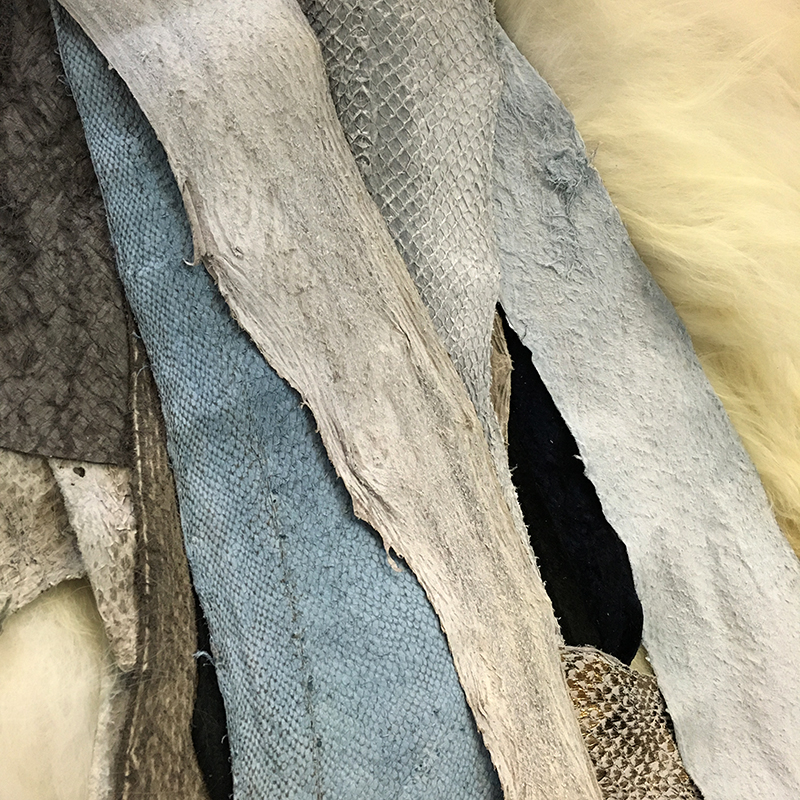
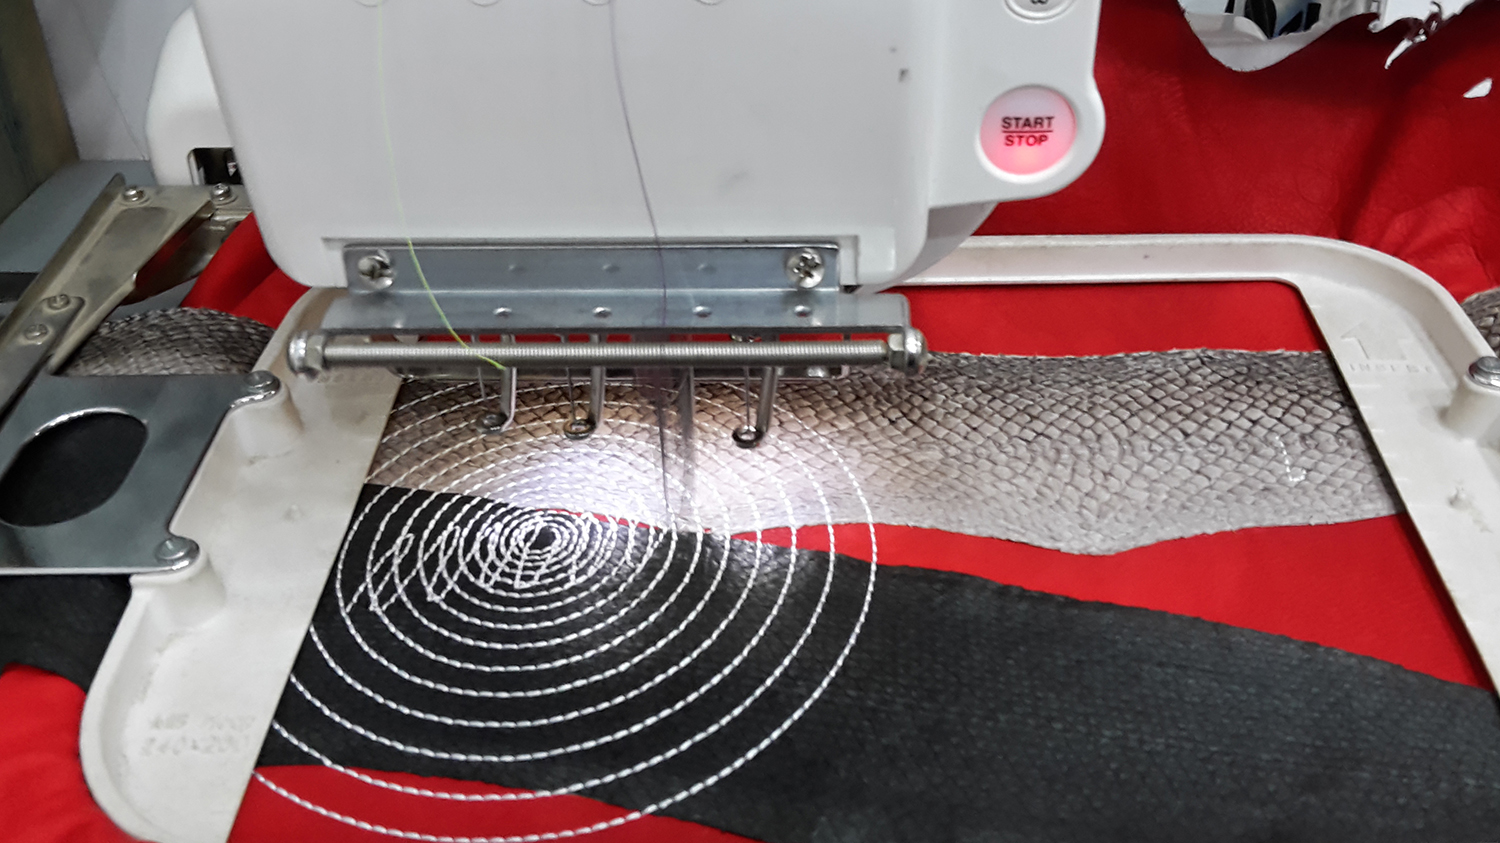
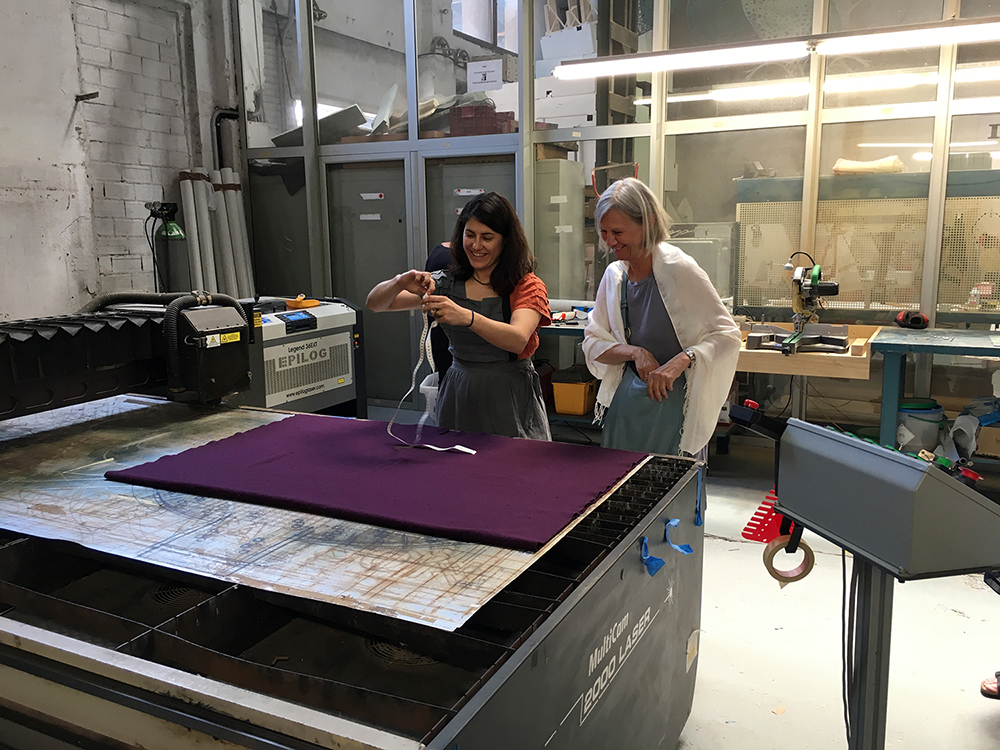
Hands on use of laser cutting technology for fabrics, from 2D patterns to 3D structures. The participants were introduced to 2D design programs and file preparation for laser cutting fabrics. A great variety of different fabrics was tested and a catalogue of speeds and power for each fabric was generated for cutting and laser engraving. The participants brought as well local fabrics from Iceland such as fish leather, felt, cow leather and horse hair in order to learn how these materials can be used with digital fabrication technologies and apply the techniques back in their schools.

IMG_2714

Day 2 (6 hours)
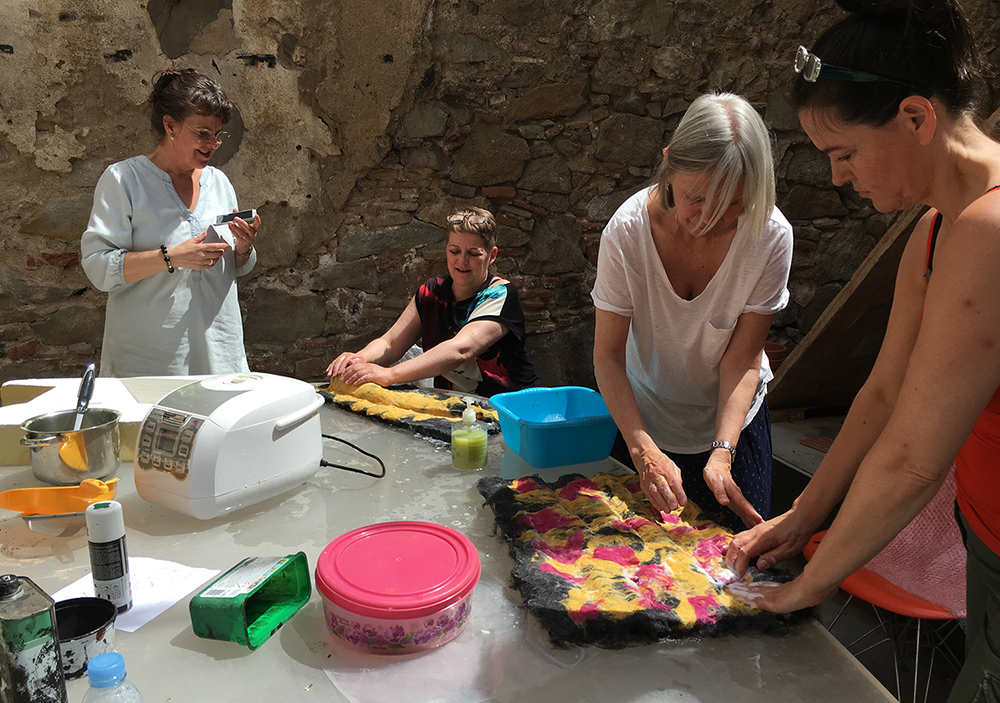
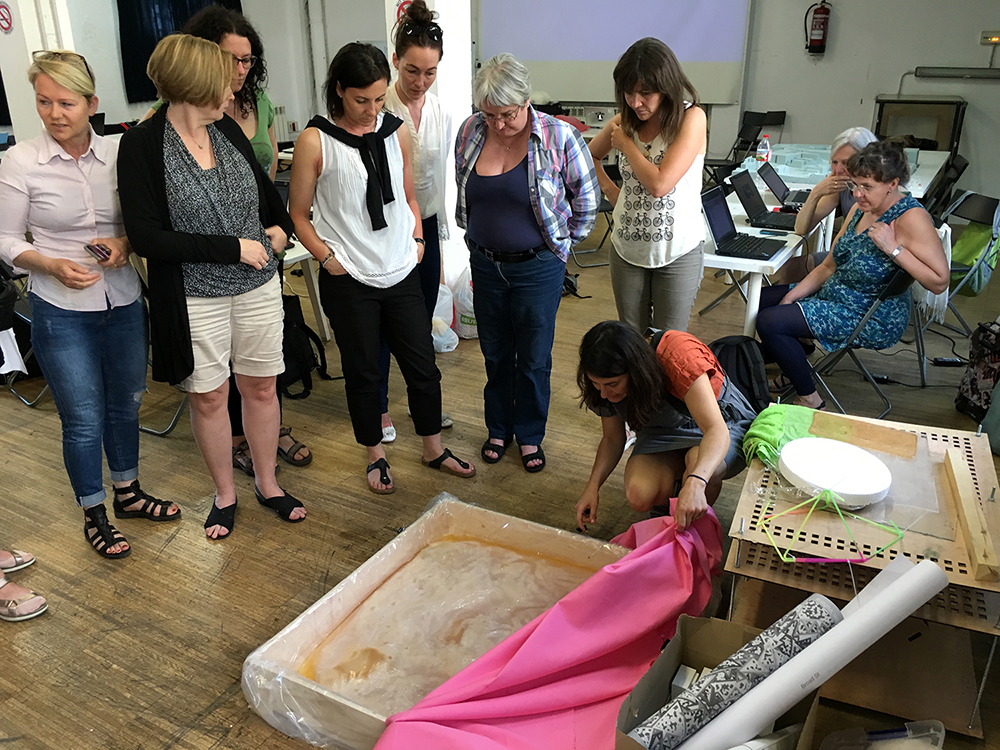
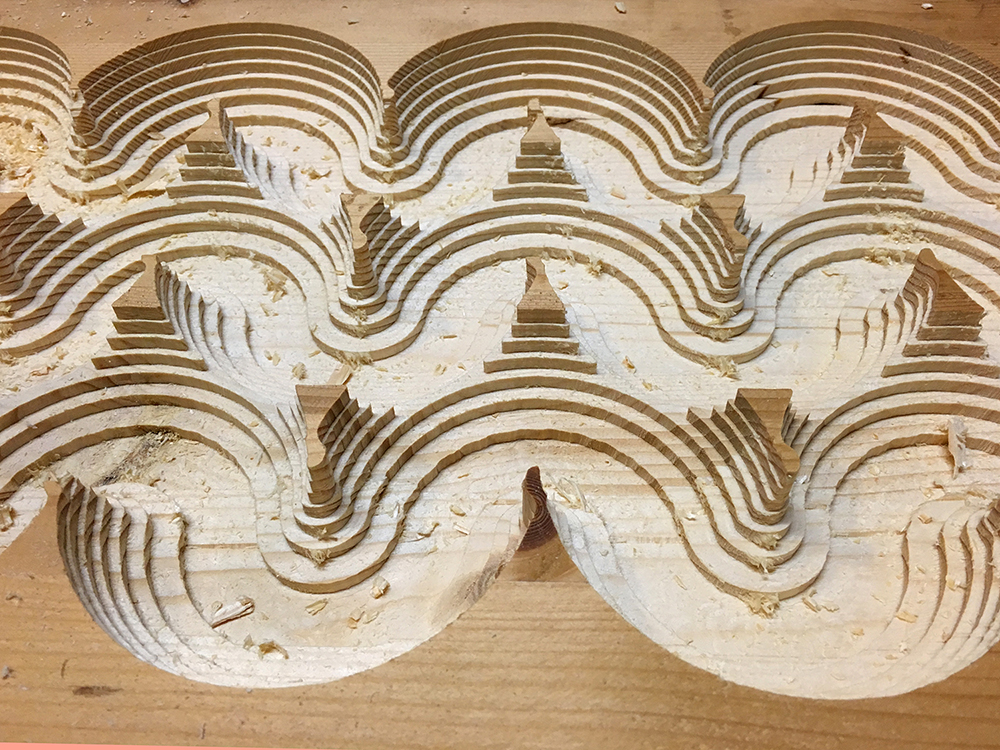
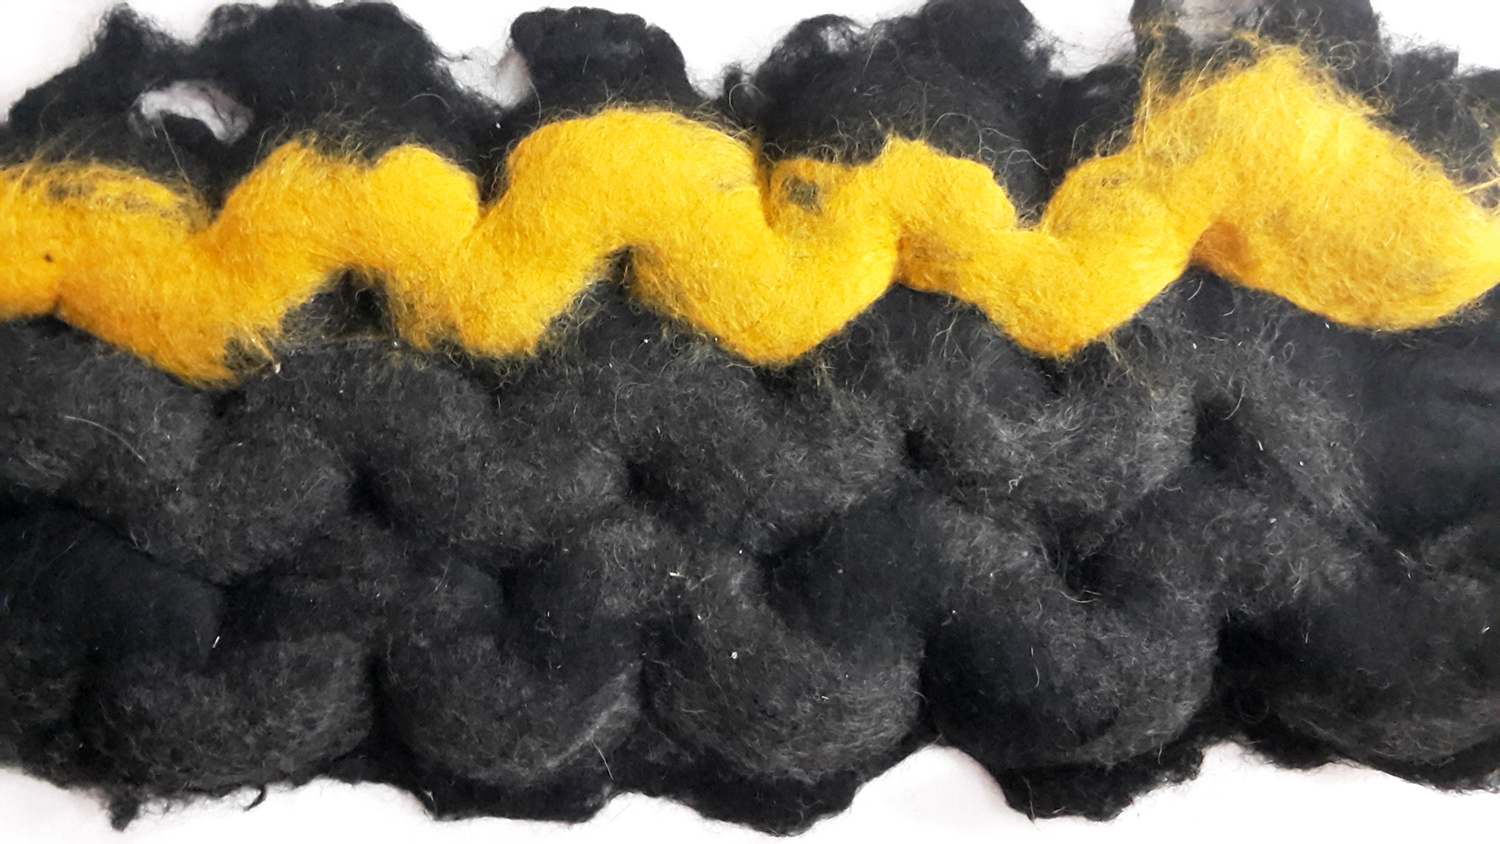
Molding Felt and CNC milling
Hands on work
IMG_1133
20160610_124129
Day 3 (6 hours)
Introduction to 3D printing applied in fashion
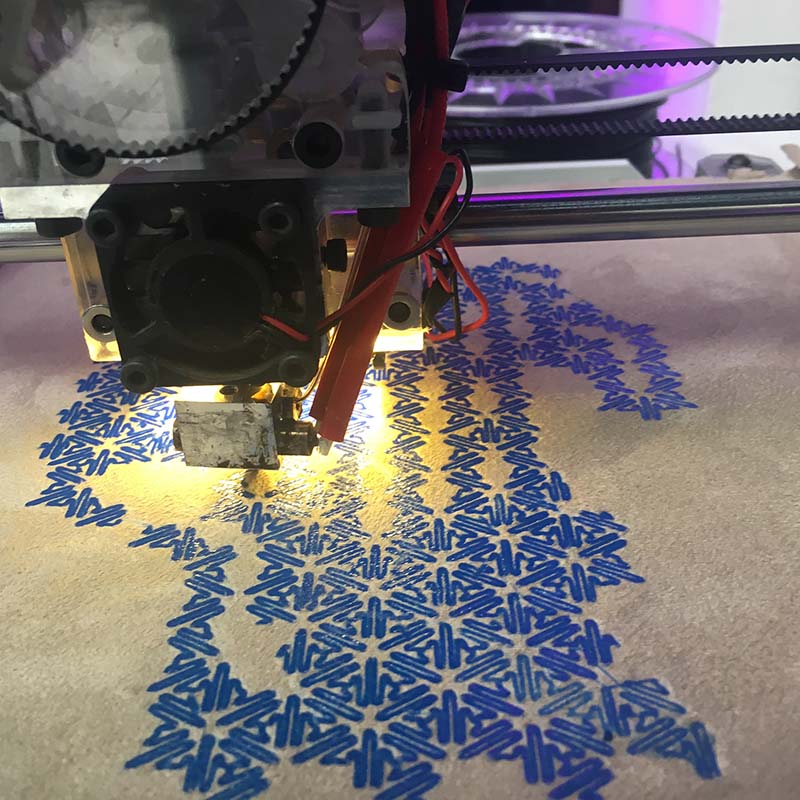
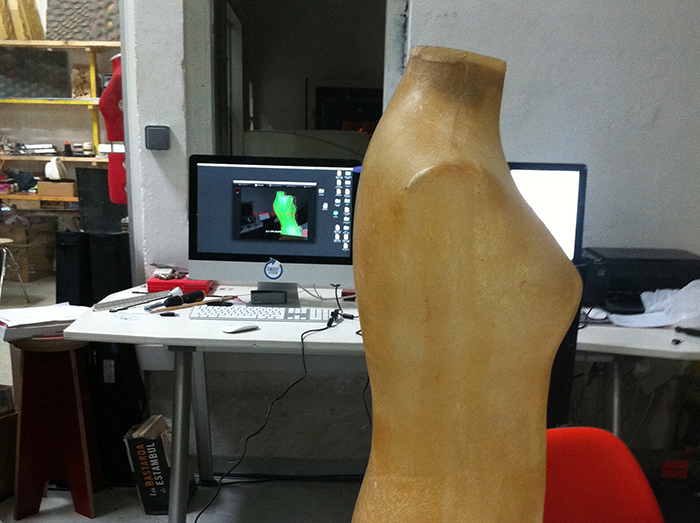
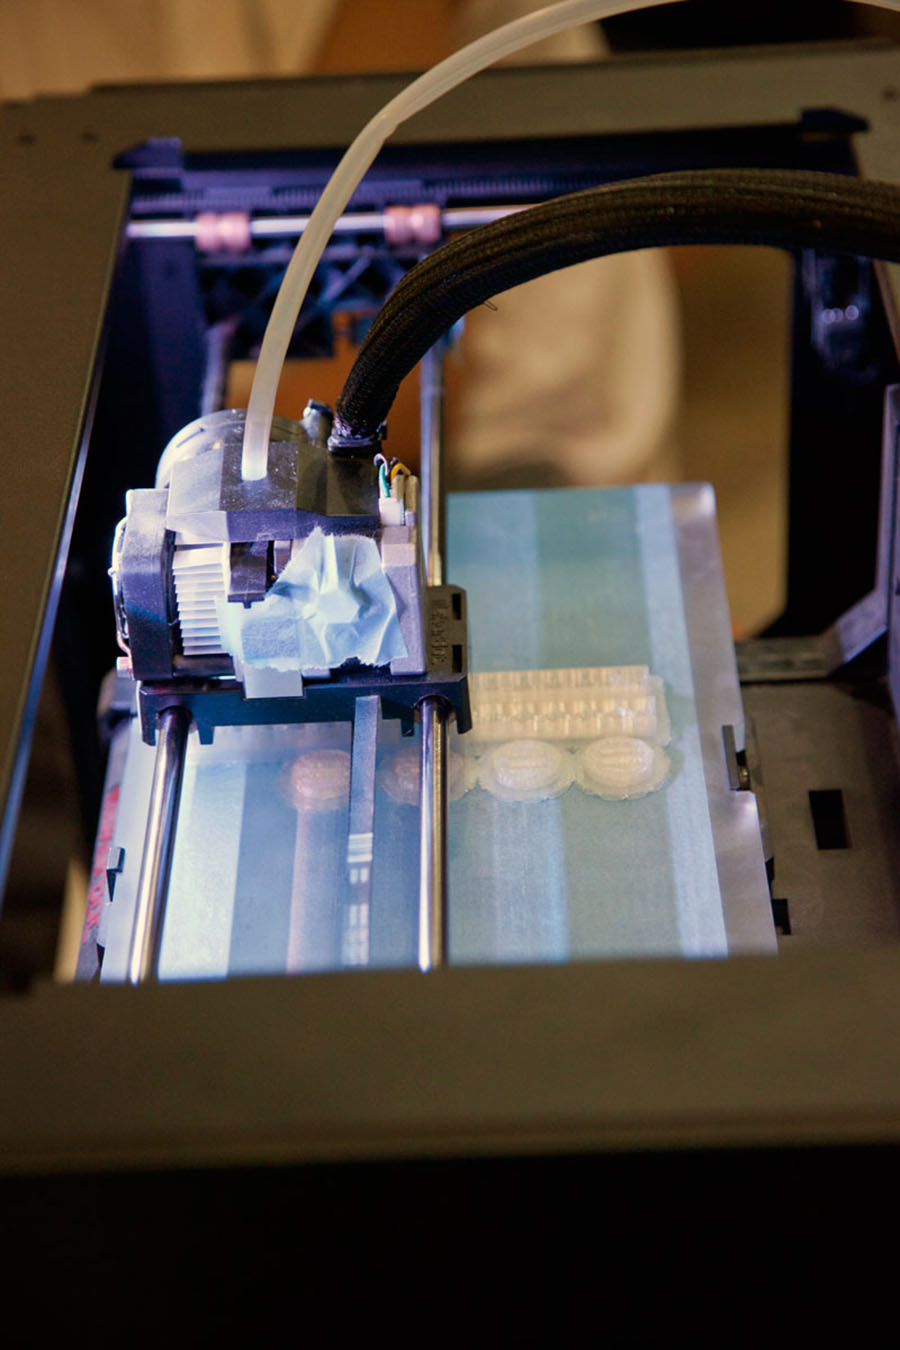
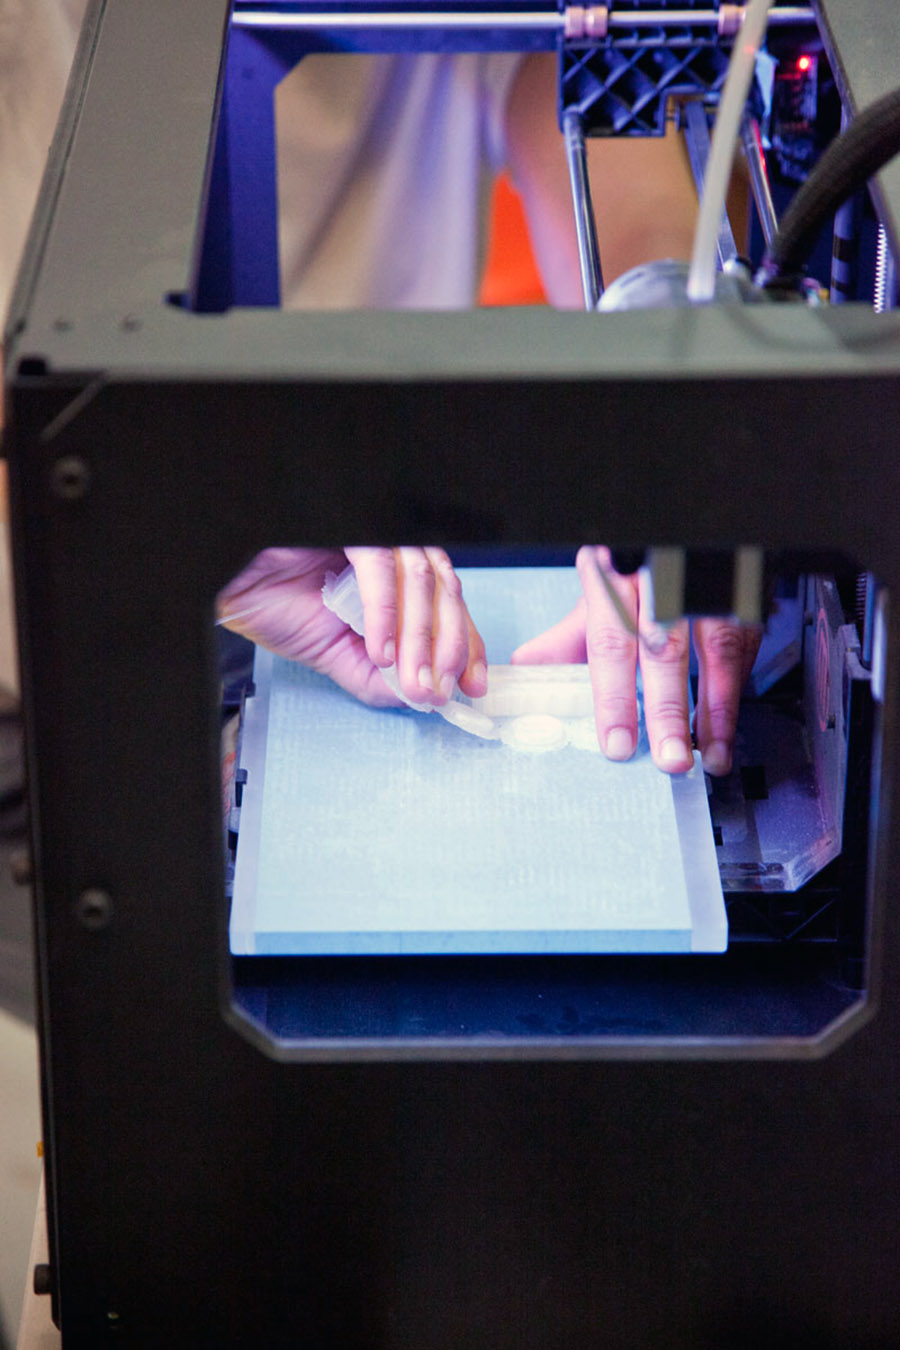
The exercise was a introduction to 3D modelling through parametric design using Rhinoceros and Grasshopper and file preparation steps and tips for 3D printing. The technique implies the use of fabric on the 3D printer platform where the flexible filament adheres. The grasshopper definition generates curly volumes that vary in width and height. If the fabric used on the platform is stretched the curly pattern can impose the deformation of the fabric into a 3D structure.
This tutorial gives an insight into the correct choice for fabric and appropriate 3D geometries that give properties to the soft structure.

IMG_2627
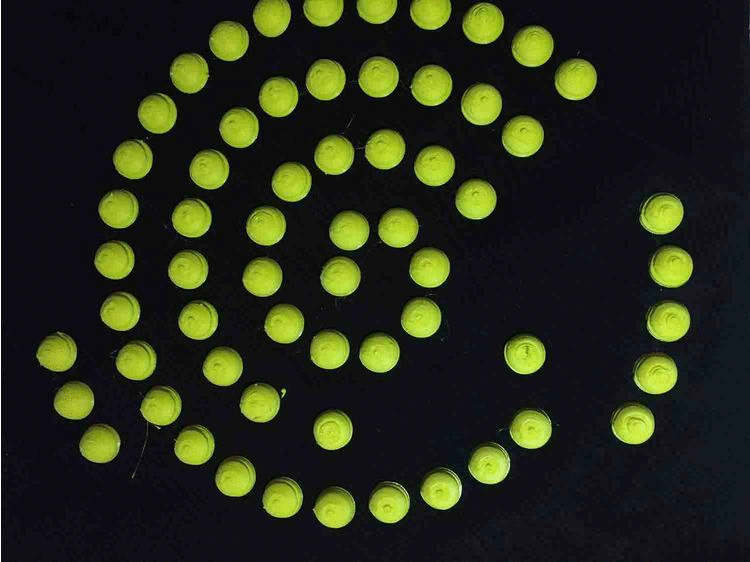
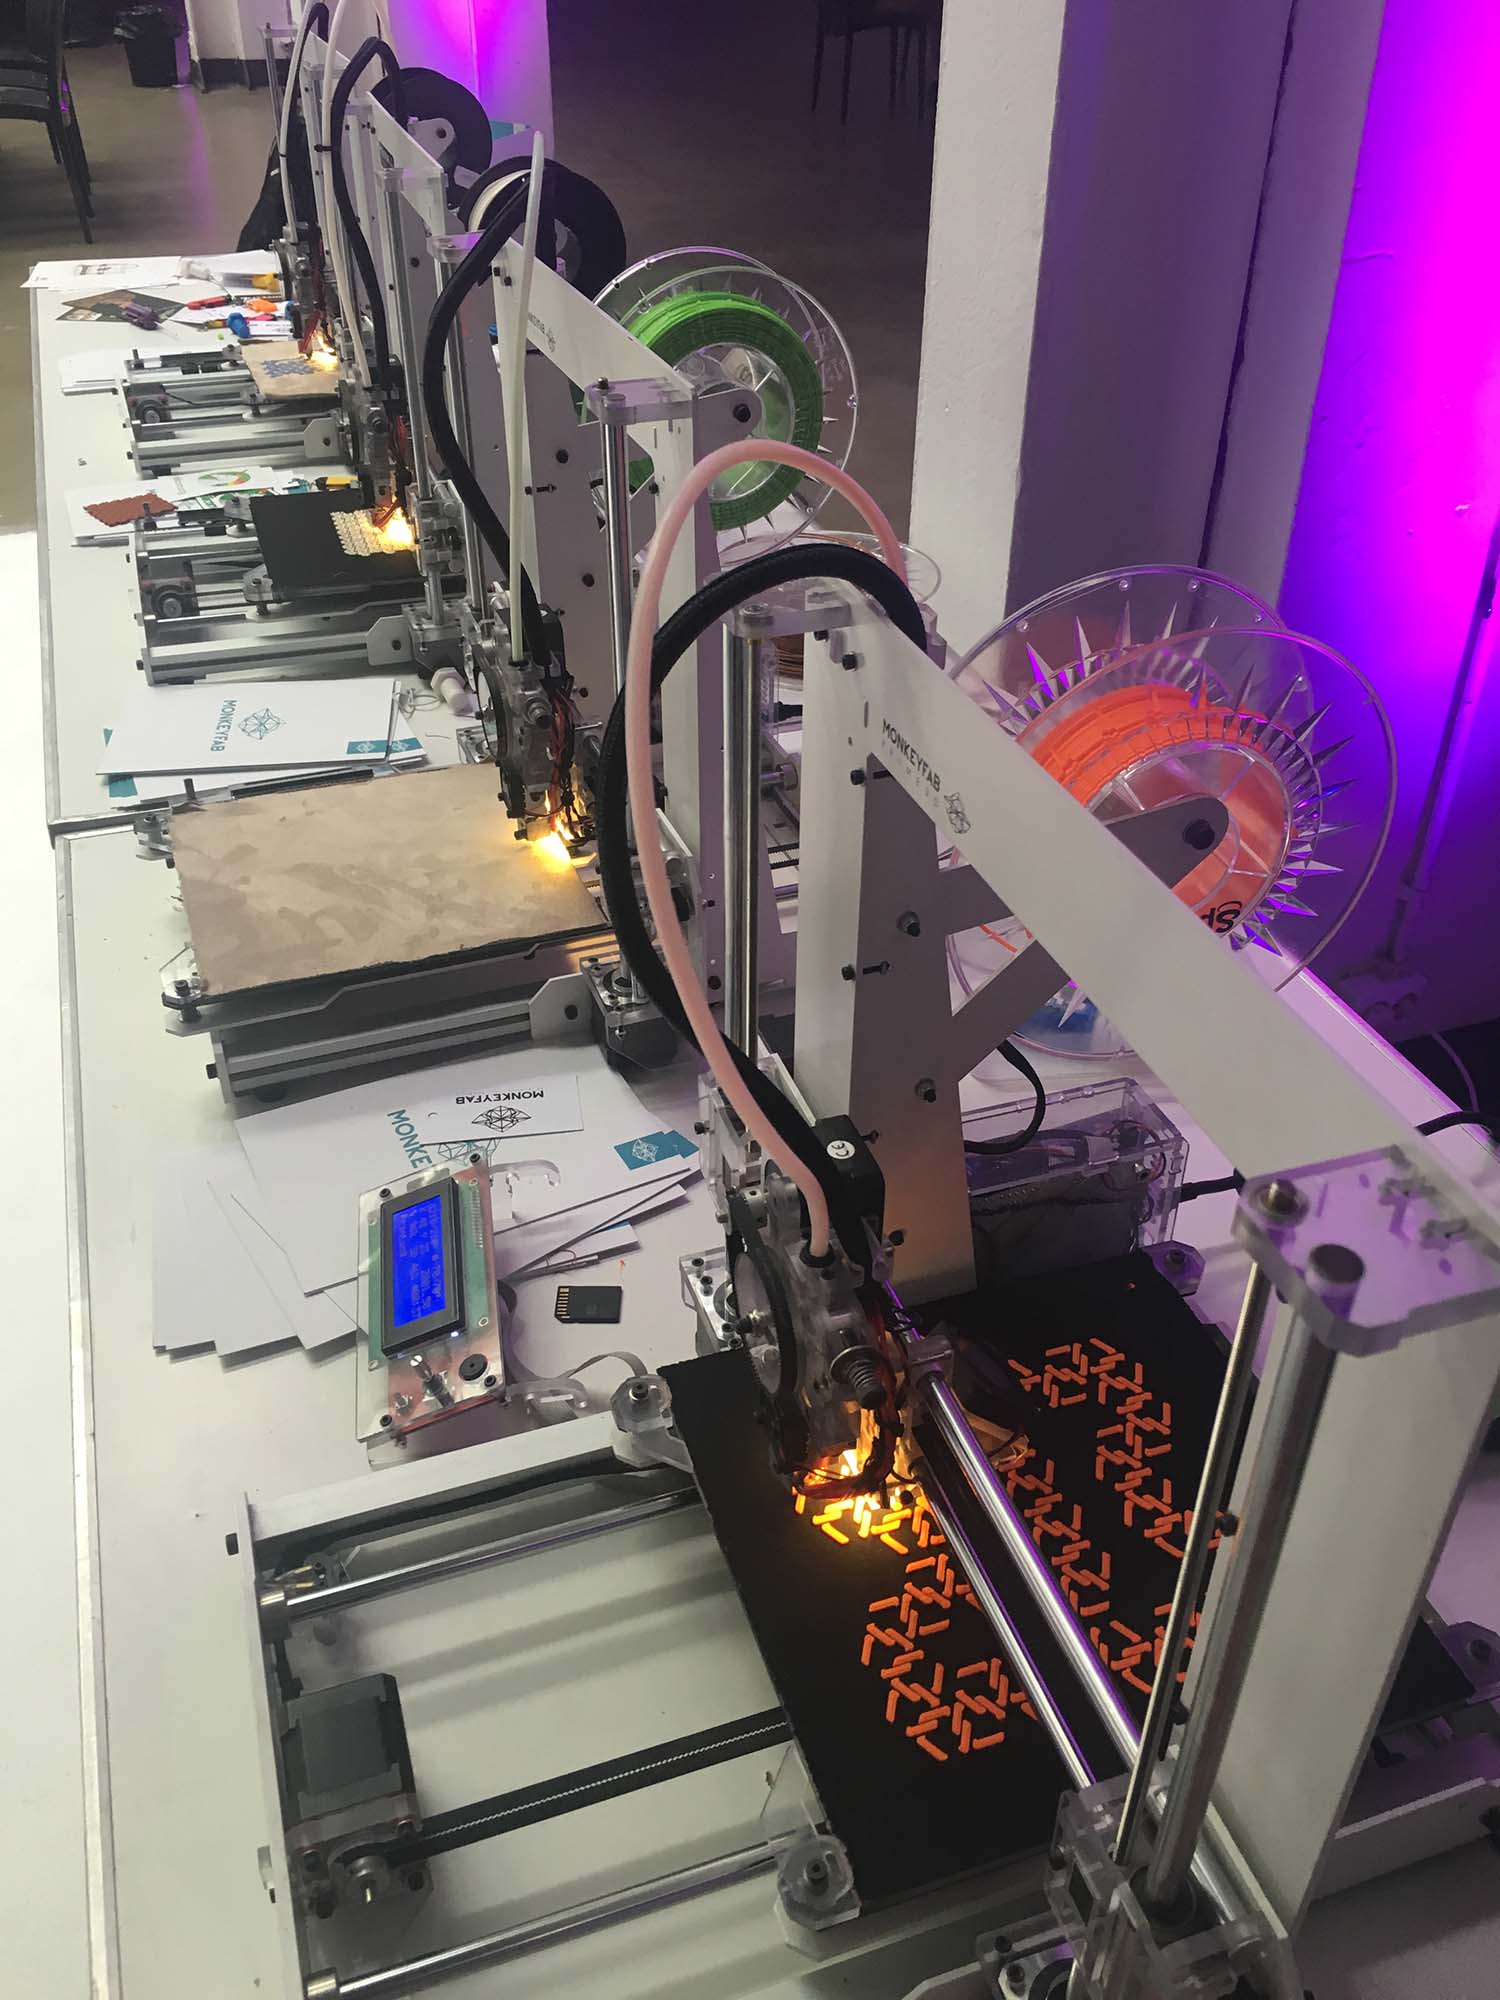
3D printing on fabrics Technique

Day 4 (6 hours)
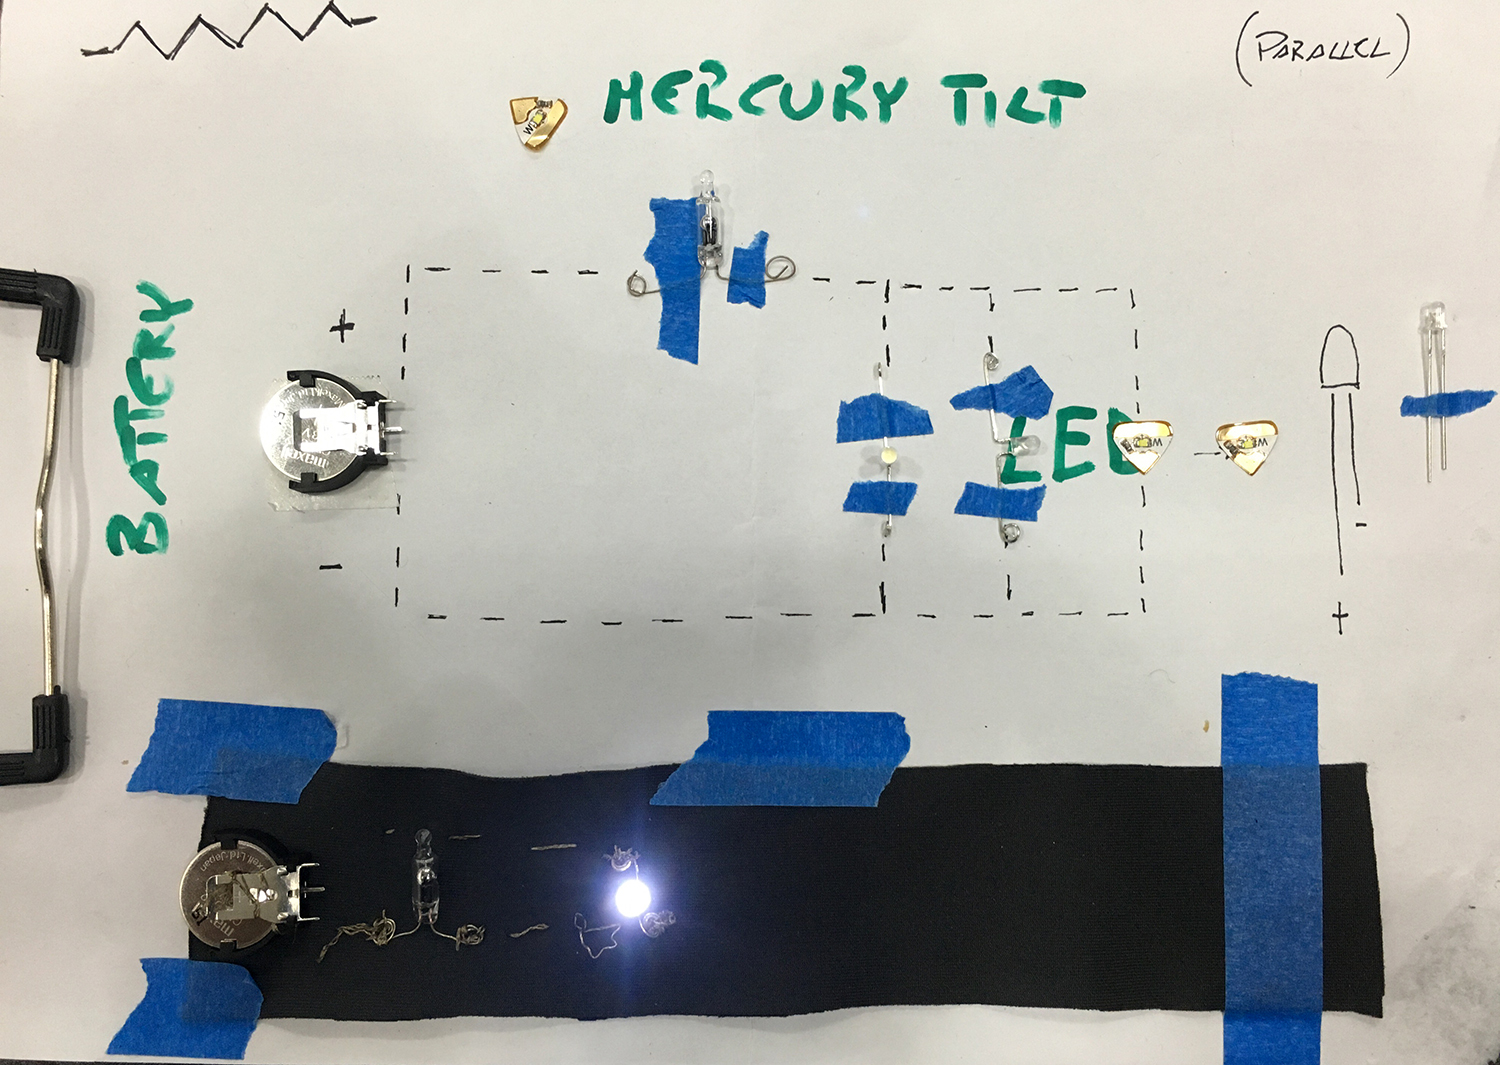
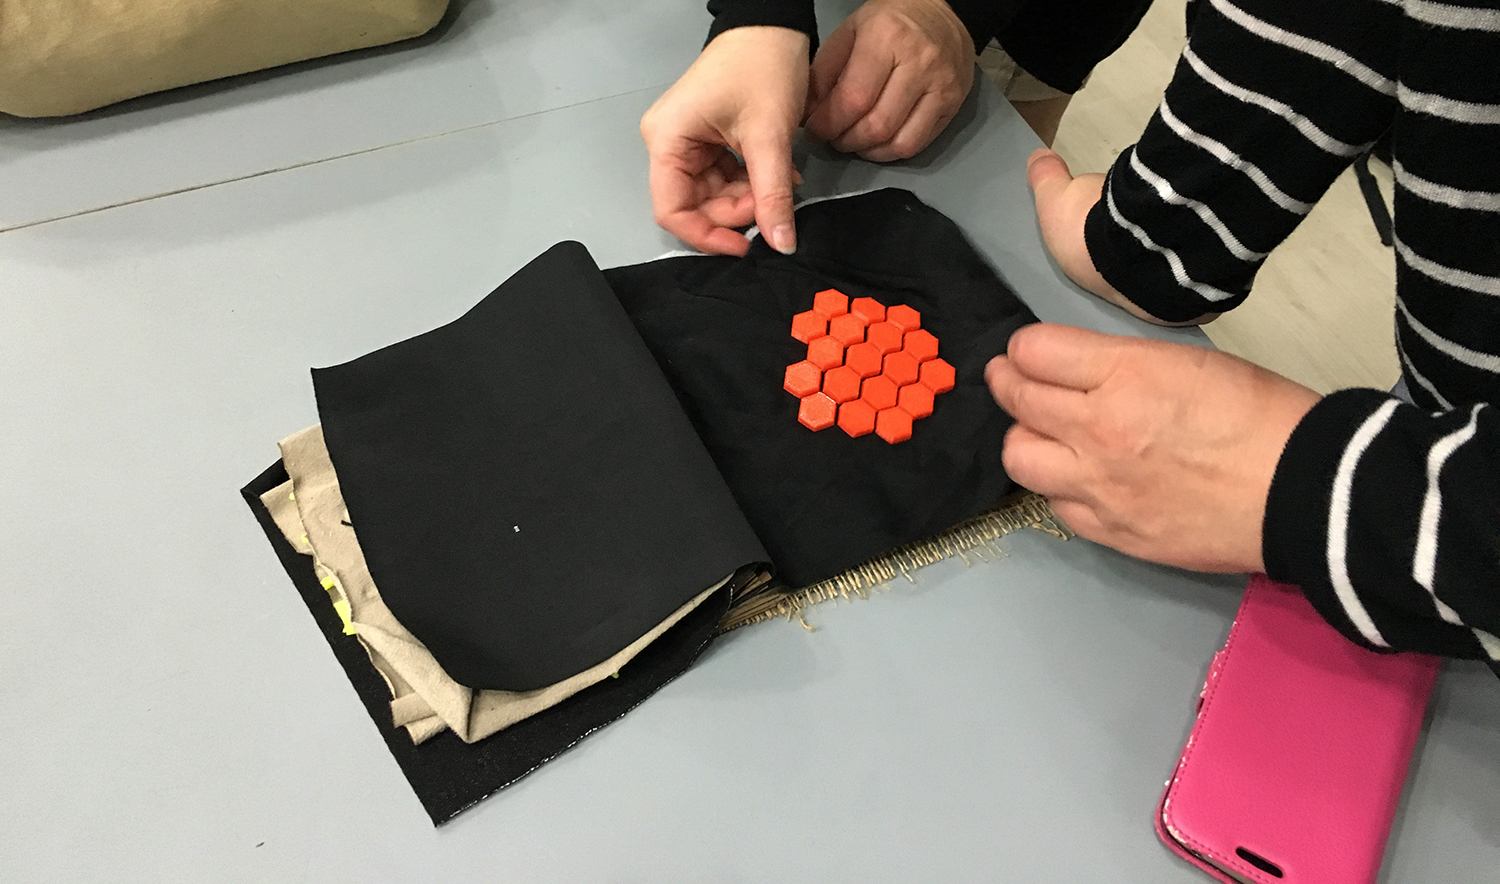
Integrating soft circuits in the garment
Basic Tilt sensor with LED circuit
Participants used basic electronic components such as conductive thread, LEDS, battery and tilt sensor in order to make a small circuit that was integrated into a laser cut bracelet pattern.
IMG_1158
class="post-1413 post type-post status-publish format-standard has-post-thumbnail hentry category-3d-print category-fab-lab-barcelona category-fab-textiles tag-3d-print-on-fabric tag-3d-printing tag-fablabbcn tag-fabtextiles">

3D PRINT ON FABRIC @MCE3 conference

This is a quick tutorial to make your 3D printing on fabrics.

This samples have been realised during the workshop at MCE3 conference in Warsaw. That shows you how 3D printing with rubber filament adheres on textiles and what kind of geometries you can try to print. The 3d printers are from Monkeyfab, that supported the workshop during the conference.

1)To make the fabric fixed during the printing, put double sided tape on the platform of the 3d printer.
 2) Now you can place the fabric. Be careful, don’t stretch it if you don’t want deformations on the result.
 3)  You have to readjust the nozzle height so that you fine tune the distance between the fabric and the extruder.
 4) Print with rubber/ flexible filament for better adhesion
5) Try to heat up the build platform if you see that it doesn’t stick much in order to fuse the plastic inside the fibers
6) prefer undulated outlines than clear shapes because the total perimeter length is bigger so you have more adhesion strength.
7)The fabric preferably needs to be a little bit fluffy. On more synthetic fabrics or wider mesh fabrics the adhesion was not as good as the “hairy” ones.
If you want to contribute to the tutorial send us an email at> [email protected]
samples 3D print on fabric

3D PRINTERS

class="post-1083 post type-post status-publish format-standard has-post-thumbnail hentry category-uncategorized tag-3d-printing tag-computational-couture tag-fab-lab-barcelona tag-fab-textiles tag-iaac tag-laser-cutting">

Computational Couture @Beyond

Last May 19th to 22nd, in the context of the International Construction faire Construmat  and within the Pavilion of InnovationIaaC|Fab Lab Barcelona runned the Computational Couture workshop.

The Computational Couture workshop focused on expanding the horizons of dress making towards an algorithmic approach, and taking design beyond the physical functions of the body (movement, protection, temperature regulation) towards the evolution of cultural expression.During the workshop participants coming from different backgrounds had the possibility to work in a multidisciplinary context to co create this custom fitted clothing that brings together computation, fashion design and digital fabrication.

Computational couture looks at the creation of exclusive custom-fitted clothing (typical of haute couture) through the lens of a systemic approach, extending the sartorial techniques with 3D modeling and computation-based approaches developed in Rhinoceros and the visual programming environment Grasshopper.Aim of the workshop is to exert, infuse and expand the sartorial sensibilities to body proportions and dress making into an algorithmic approach that loops through design and fabrication by means of laser cutting and 3d printing for the design and production of a garment.

Tutors> Alessio Erioli, Anastasia Pistofidou, Lidija Stanojcic

IMG_8977


IMG_8915


class="post-731 post type-post status-publish format-standard has-post-thumbnail hentry category-exhibitions category-mannequins tag-3d-printing tag-fab-10 tag-fab-lab-barcelona tag-fab-lab-bcn tag-fab-textiles tag-iaac tag-mannequin tag-waffle-structure">

RIG mannequin

RIG is a digitally processed and fabricated mannequin designed for ¨Fab-Textiles Showcase¨ during the Fab10 international conference in Barcelona.

The design for RIG is an exploration into the creative potential of mannequins as tools for exhibiting and work with. RIG is a manifestation on how tools should be rethought, redesigned, and reimagined. As one walks around the waffle structure, the perspective of three-dimensionality makes the volume of the RIG appear and disappear.  From the side, the physical representation of the human body is defined, yet as the visitor moves towards the front of the mannequin, the body slowly disappears, allowing the clothing to properly showcase itself.

For the digital design process, the software 123d Make was used to generate the waffle structure, where you can find all the files. Each section of the mannequin required a different waffle density depending on the structural requirements and resolution of detail required. These varying strategies were applied to the right arm, the left arm, the torso and the base and then compiled into Rhino to adjust the overlapping conditions. In total, 15 mannequins were produced with each RIG consisting of 184 unique pieces lasercut out of 3mm MDF.

rig fab textiles 1

rig fab textiles 2

rig fab textiles 3

lanaRIG rigsmal


Credits: Fab Lab Barcelona

Design: Lana Awad

Fabrication: Lana Awad, Drew Carson, Anastasia Pistofidou

Special thanks to: Carmen/Ece/Andrea/Sebastian/Thiago/Andre/Efilena/

Photography credits: Thiago Kunz

class="post-659 post type-post status-publish format-standard has-post-thumbnail hentry category-talleres tag-3d-printing tag-embird-software tag-fab-lab-barcelona tag-fab-lab-bcn tag-fab-textiles tag-laser-cutting tag-raster-image-on-fabric tag-rhinoceros tag-textiles">

Fab Textiles V5

Fab Textiles V5: Redefining pattern making and traditional seam joinery

Participants to this edition of the Fab textiles workshop were introduced to digital modelling techniques that allowed them to develop designs in Rhino and fabricate personally customised clothing using the technology provided at the lab.

The first assignment was to transform an image using Grasshopper into complex geometry using a series of data manipulations based on colour information.

Once participants had a basic understanding of digital model and manipulation techniques, they learned methods to digitally design and produce individually designed clothing. First, a mannequin was scanned using Kinect and imported into Rhino. Participants then collectively decided on the design of the garment by physically projecting lines onto the body. These lines were then imported into rhino and digitally projected onto the mannequin. These lines delineated the components that would then be laser cut from textiles and assembled as a kit of parts.

Using this process, participants have learned how to fully develop their textile based projects digitally from the design project, all the way through to development and fabrication.

Introduction to the Fab Lab Machinery

IMG_9061

Fabrication of Textile Patterns

IMG_3701

Rastered Textiles with Patterns

IMG_3700

Kinect scanning of the Mannequin

IMG_3690

Video of Digital Production:

Fab Textiles V5 from Fab Lab Barcelona on Vimeo.

class="post-554 post type-post status-publish format-standard has-post-thumbnail hentry category-patronaje-digital category-recycling tag-3d-printing tag-bordado-digital-2 tag-fab-textiles tag-recycling-2">

Lab Bag

Lab Bag 01

This project was conceived as a way to recycle previously used material into newly designed laptop bags. The material was provided from old canvas boards used for the My Very Own City (MVOC) exhibition that were designed and fabricated in the Fab Lab back in 2012.

Lab Bag 02

The concept of the design was driven by the idea of creating a bag without using conventional sewing methods and instead rely only on digitally fabricated methods.

Lab Bag 03

This collection is limited to 90 individual pieces that each have their own unique character and design and implement laser cutting as well as 3D printing techniques

Lab Bag 04

Each bag has the ability to be folded in either of two ways and an instruction kit was made in order to allow the user to fold and wear the bag as they please.

Option 01.

Lab Bag 05

Option 02.

Lab Bag 06


Download the open-source fabrication file here: LabBag

class="post-898 post type-post status-publish format-standard has-post-thumbnail hentry category-3d-print category-bordado-digital category-patronaje-digital category-talleres tag-3d-printing tag-bau tag-digital-pattern tag-fab-lab-barcelona tag-fab-lab-bcn tag-fab-textiles tag-lasercut-clothes tag-raster-image-on-fabric tag-textiles tag-workshops">

Summer workshop with Fashion students of BAU, School of Design

During the summer workshops, fashion students of BAU, School of Design made a workshop of digital fabrication technologies applied in  fashion.Students were introduced to laser cutting patterns, laser cutting existing clothes, 3D printing and digital embroidery.Digital fabrication opens different possibilities in Fashion education,  production and consumption.

The students during the workshop were introduced to the maker culture and technologies available in the context of the Fab Lab Barcelona in order to understand the possibilities of digital creation and learning by doing methods in fashion.
FabLab_00FabLab_01FabLab_02FabLab_03FabLab_04FabLab_06FabLab_07FabLab_08FabLab_11